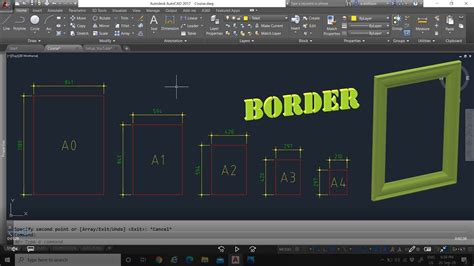
Welcome to our blog post on Autocad Image Border! In this post, we will explore the process of adding borders to images in Autocad. Whether you are an architect, engineer, or designer, Autocad is a powerful tool for creating precise and detailed drawings. Adding borders to your images can enhance their presentation and make your designs more professional-looking. Let’s dive in!
Setting up the Image
Before we can add a border to an image, we need to ensure that it is properly inserted into our Autocad drawing. To do this, follow these steps:
- Click on the “Insert” tab in the top menu.
- Select “Attach Image” to browse for and select the desired image file.
- Position and scale the image as needed using the insertion point and scale options.
- Click “OK” to insert the image into your drawing.
Creating a Border Layer
Now that the image is inserted, we can proceed to create a border layer. This layer will contain the border elements that we will add later. To create a new layer, follow these steps:
- Type “LAYER” in the command line and press Enter.
- Click on the “New Layer” button in the Layer Properties Manager.
- Give the new layer a name, such as “Image Border,” and set its color and linetype as desired.
- Click “OK” to create the new layer and close the Layer Properties Manager.
Adding a Polyline
With the border layer ready, we can now add a polyline to define the shape of the border. Follow these steps:
- Type “PLINE” in the command line and press Enter.
- Select the starting point of the polyline by clicking on the desired location in the drawing.
- Continue to click on additional points to create the desired shape of the border.
- Once the border shape is complete, press Enter to finalize the polyline.
Modifying the Polyline
Now that the polyline border is created, we can make adjustments to its appearance. To modify the polyline, follow these steps:
- Type “PEDIT” in the command line and press Enter.
- Select the polyline object you created for the border.
- Choose the “Width” option to adjust the thickness of the border.
- Select the “Join” option to smooth out any sharp corners in the border.
- Click “OK” to apply the modifications and exit the PEDIT command.
Assigning the Border Layer
Now that the border is ready, we need to assign it to the border layer we created earlier. Follow these steps to assign the layer:
- Type “CHPROP” in the command line and press Enter.
- Select the polyline border object.
- In the Properties window, choose the “Layer” option.
- Select the “Image Border” layer from the dropdown menu.
- Click “OK” to apply the layer assignment.
Conclusion
Adding a border to your images in Autocad is a simple yet effective way to enhance the presentation of your designs. By following the steps outlined in this blog post, you can easily create professional-looking borders for your drawings. Give it a try and see the difference it makes!
Leave a Comment
We hope you found this blog post helpful. Have you ever used Autocad to add borders to your images? Do you have any additional tips or insights? We would love to hear from you! Please leave a comment below and let’s continue the discussion.
AutoCAD How to Remove Border From Images – Plus PDFs & A …
Apr 13, 2021 … Hey Everybody! Brandon here with yet another 2-Minute Tuesday, extending the continuous streak to somewhere over a dozen in a row! – cadintentions.com

Solved: Trouble with image border when writing block – AutoCAD
Dec 30, 2016 … the FRAME system variable overrides the IMAGEFRAME setting so go and check FRAME numbers. (from HELP – F1 ). or I suggest to change the … – forums.autodesk.com
Images without Borders – AutoCAD General – AutoCAD Forums
Tankman … The image might have a border. Open the image in “Paint” or whatever, and erase the borders image. Save after erasing the border or, … – www.cadtutor.net
Remove Frame (Border) for a Single Raster Image Only – AutoCAD
Aug 4, 2019 … IMAGEFRAME controls the frame of all the raster image in the drawing. If in case you want to hide the frame of single raster image I would … – forums.autodesk.com
How to turn off border around an image in AutoCAD
Oct 18, 2023 … How to turn off the border around an image in AutoCAD. Set the IMAGEFRAME system variable to a value other than 1. Type IMAGEFRAME on the … – www.autodesk.com

Autocad Border Around Image
Autocad Border Around Image: Enhancing Your Designs with Precision and Style In the realm of computer-aided design (CAD) Autocad stands as a powerful tool that enables architects engineers and designers to create intricate and accurate drawings. One feature that often goes unnoticed is the ability t – drawspaces.com
Solved: imageframe in an xref – Autodesk Community – AutoCAD …
Apr 15, 2010 … Solved: I have an image in an xref and when I plot, the frame shows up. I have imageframe turned off in both the reference drawing and the … – forums.autodesk.com
Insert image, unload image, image border stays around
Apr 8, 2015 … I’m confused about the way autocad treats inserted imagery. Sometimes I’ll have three images (JPGs or PNGs) behind my drawing as a reference … – forums.augi.com
Solved: Turn Off Image Border – Autodesk Community – Civil 3D
Nov 28, 2012 … Welcome to Autodesk’s Civil 3D Forums. Share your knowledge, ask questions, and explore popular AutoCAD Civil 3D topics. – forums.autodesk.com
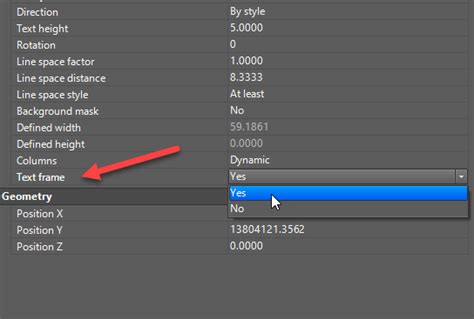
AutoCAD 2022 Help | To Show or Hide Image Boundaries | Autodesk
To hide image boundaries, enter 0; to show and plot image boundaries, enter 1; to show image boundaries but not plot them, enter 2. Related Concepts. About … – help.autodesk.com
Autocad Attach Image Permanently
Autocad Attach Image Permanently: Enhancing Design Efficiency Introduction (Word Count: 200-250 words) Welcome to this comprehensive blog post on how to attach images permanently in Autocad! As a professional designer or architect you understand the importance of visual references when creating accu – drawspaces.com
Insert Image In Autocad Permanently
Insert Image In Autocad Permanently: A Comprehensive Guide Autodesk AutoCAD is a powerful software that allows architects engineers and designers to create precise and detailed drawings. One of the essential features of AutoCAD is the ability to insert images into drawings allowing users to incorpor – drawspaces.com

Crop Image In Autocad
Crop Image In Autocad: A Step-by-Step Guide to Enhancing Your Design Skills In the world of computer-aided design (CAD) AutoCAD has become the go-to software for professionals and enthusiasts alike. Its versatility and powerful tools make it an excellent choice for various design tasks. One essentia – drawspaces.com

Autocad Border Around Text
Autocad Border Around Text: Enhancing Precision and Visual Appeal In the world of computer-aided design (CAD) Autocad has long been a go-to software for architects engineers and designers. Its versatility and powerful features allow users to create detailed and accurate drawings. One essential aspec – drawspaces.com
Clip Image In Autocad
Clip Image in AutoCAD: A Comprehensive Guide to Efficiently Manipulating Images AutoCAD is a powerful software widely used in various industries for creating precise and detailed drawings. While it excels at designing and drafting it also offers valuable tools for manipulating images within the prog – drawspaces.com

Add or Remove Image Frames or Boundaries for JPEGs, PDFs, etc …
Dec 16, 2020 … Type 0 to make image frames invisible, both in your drawing and when you plot. Type 1 to make image frames visible, both in your drawings and … – www.landfx.com